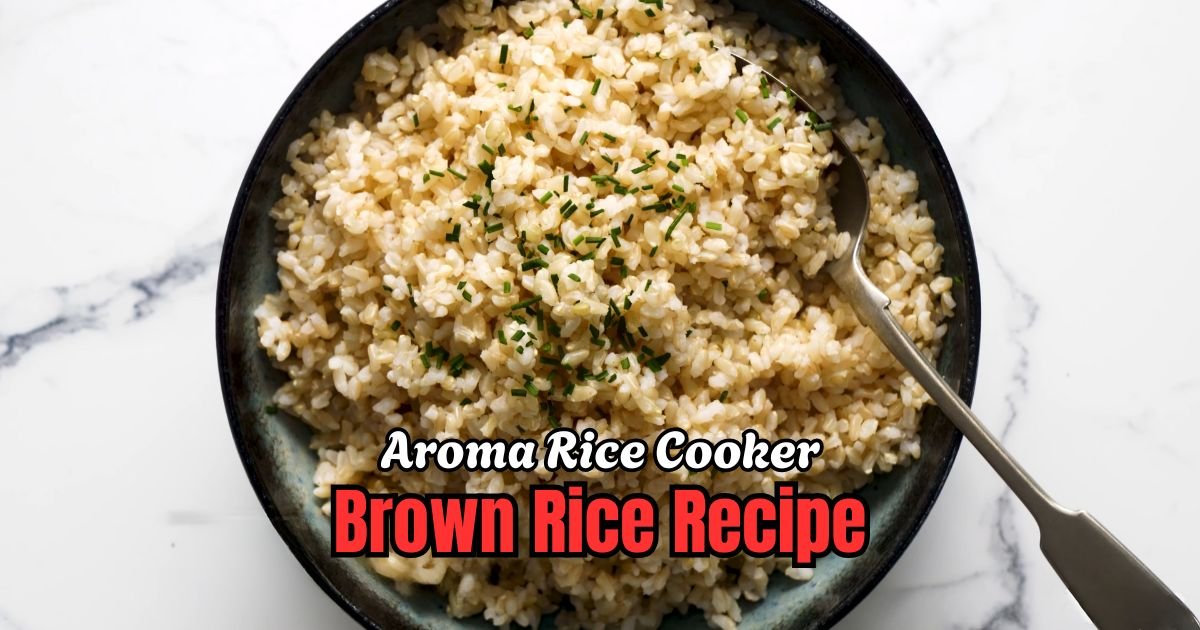
Aroma Rice Cooker Brown Rice Recipe
I love making brown rice in my Aroma rice cooker—it’s so easy and comes out perfect every time!
This Aroma Rice Cooker Brown Rice Recipe is a simple way to get fluffy, nutty rice without any fuss. Picture this: you toss in rice and water, press a button, and walk away while your kitchen fills with a warm, toasty aroma.
You’ll love this recipe because it’s quick, healthy, and works with any meal. If you’re looking for a no-stress side dish, this is it!
Want more easy recipes? Check out my Crockpot Recipes for other simple dishes. Let’s get cooking with this foolproof method that makes brown rice a breeze!
Why You Love This Aroma Rice Cooker Brown Rice
I can’t get enough of this Aroma Rice Cooker Brown Rice Recipe! It’s simple, healthy, and tastes so good. Here’s why you’ll fall in love with it too:
- Super Easy: Just toss in rice and water, press a button, and walk away.
- Healthy Choice: Brown rice is packed with fiber and nutrients.
- No Mess: The rice cooker keeps everything clean—no sticky pots!
- Versatile: Pairs with anything, from stir-fries to soups.
This recipe is a game-changer. I use my Aroma rice cooker all the time because it makes perfect rice without any effort.
Aroma Rice Cooker Brown Rice Ingredients
Here’s what you need to make this easy recipe. Each ingredient is simple but makes a big difference in taste and texture.
- Brown Rice (1 cup): I use long-grain brown rice because it cooks up fluffy and separate. It’s got a nutty flavor and chewy texture, plus it’s a whole grain, so it’s good for you. Short-grain works too, but it’s stickier.
- Water (2 ¼ cups): The right amount of water is key to perfect rice. Brown rice needs a bit more than white rice because of its bran layer. I use cold, filtered water for the best taste.
- Salt (½ teaspoon, optional): A pinch of salt brings out the rice’s natural flavor. I add it for a tastier dish, but you can skip it if you’re watching sodium.
- Olive Oil (1 teaspoon, optional): I sometimes drizzle in a little olive oil to keep the grains from sticking and add a subtle richness. It’s not a must, but it’s a nice touch.
Helpful Swaps
If you’re missing something or want to mix it up, here are some swaps that work great:
- Rice Swap: Try brown basmati rice for a fragrant twist. Quinoa can replace rice for a protein-packed option, but use 2 cups water instead.
- Water Swap: Use chicken or vegetable broth instead of water for extra flavor. It makes the rice taste richer.
- Oil Swap: Butter or coconut oil can replace olive oil for a different taste. Use the same amount.
- No Salt?: Skip the salt and add herbs like thyme or a bay leaf to the cooker for flavor.
Kitchen Equipment Needed
You don’t need much to make this dish. Here’s what I use:
- Aroma Rice Cooker: The star of the show! I have a digital model with a brown rice setting, but any Aroma cooker works. Check your manual for settings.
- Measuring Cup: The one that comes with your rice cooker (about ¾ standard cup) is best. I also use a standard liquid measuring cup for water.
- Fine Mesh Strainer: Great for rinsing rice to remove starch. A colander works in a pinch.
- Rice Paddle or Wooden Spoon: For fluffing and serving. Plastic or wood is gentle on the cooker’s nonstick pot.
- Small Bowl: Handy for soaking rice if you choose to do that step.
How To Make Aroma Rice Cooker Brown Rice
Making this Aroma Rice Cooker Brown Rice Recipe is so simple, even if you’re new to cooking. I’ll walk you through each step like we’re in the kitchen together. Let’s get started!
Step 1 | Measure the Rice
Grab your rice cooker’s measuring cup. Scoop 1 cup of brown rice. If you’re using a standard cup, it’s about ¾ of that. I like to make enough for leftovers.
Step 2 | Rinse the Rice
Put the rice in a fine mesh strainer. Run cold water over it for 10-15 seconds, stirring with your hand. Keep rinsing until the water is mostly clear. This removes extra starch so the rice doesn’t get gummy. Shake off extra water.
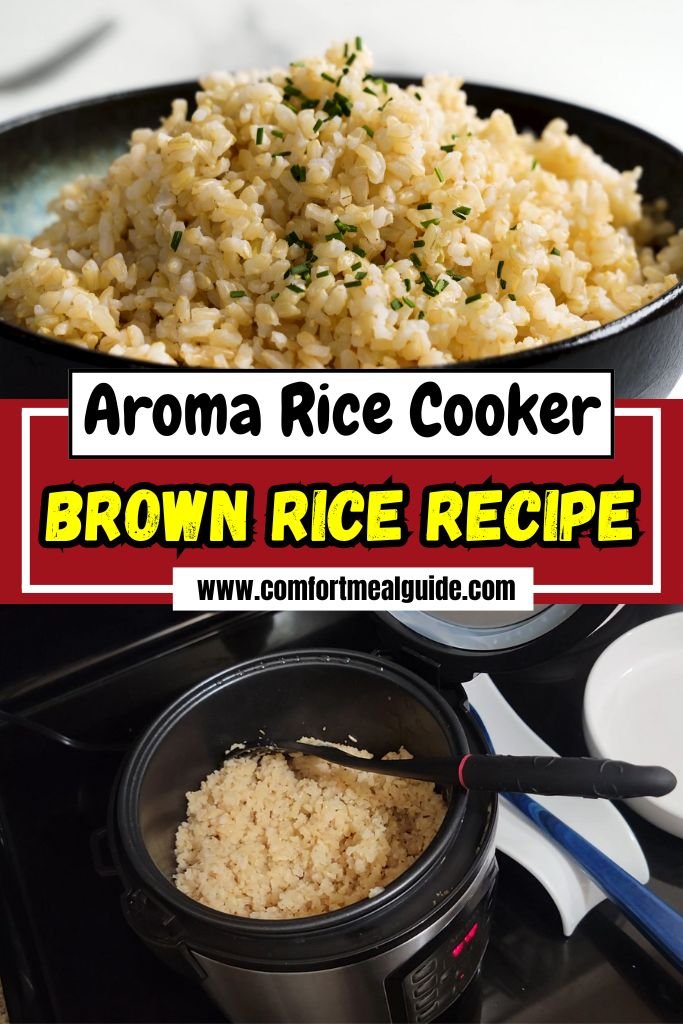
Step 3 | Add to Cooker
Pour the rinsed rice into the rice cooker’s inner pot. Spread it out evenly with your spoon.
Step 4 | Measure Water
Use a liquid measuring cup to add 2 ¼ cups of cold water to the pot. The extra water helps cook the brown rice’s tough bran layer. If your cooker has water lines, fill to the “1 cup” brown rice mark instead.
Step 5 | Add Salt and Oil (Optional)
Sprinkle in ½ teaspoon of salt for flavor. I also add 1 teaspoon of olive oil to keep the grains separate. Stir gently to mix.
Step 6 | Set Up the Cooker
Place the inner pot into the rice cooker. Make sure it’s snug. Close the lid tight.
Step 7 | Turn It On
Plug in the rice cooker. Press the POWER button to turn it on. The light should glow.
Step 8 | Select Brown Rice Setting
Press the BROWN RICE button. If your model doesn’t have one, use the WHITE RICE button, but it might need a bit longer. The cooker will start automatically.
Step 9 | Let It Cook
Walk away and let the magic happen! The rice takes about 35-45 minutes, depending on your cooker. You’ll hear a beep when it’s done, and it’ll switch to KEEP-WARM mode. My digital display shows a countdown for the last 12 minutes, which I love.
Step 10 | Rest the Rice
Don’t open the lid right away. Let the rice sit for 5 minutes in KEEP-WARM mode. This makes the grains fluffier.
Step 11 | Fluff and Serve
Open the lid (watch for steam!). Use a rice paddle or wooden spoon to fluff the rice. Scoop it into bowls and enjoy!
Recipe Tips for Success
Here are some extra tips to make your rice turn out amazing every time. I learned these from trial and error:
- Rinse Well: Don’t skip rinsing. It keeps the rice from clumping.
- Check Water Ratio: Too little water makes hard rice; too much makes it mushy. Stick to 2 ¼ cups per 1 cup rice.
- Don’t Peek: Keep the lid closed while cooking to trap steam.
- Clean the Pot: Wipe the pot’s bottom before cooking to avoid burning.
- Adjust for Altitude: If you live high up, you might need a bit more water or time. Test and tweak.
- Use Fresh Rice: Old rice can be dry. Buy in small amounts for best results.
Aroma Rice Cooker Brown Rice Serving Suggestion
This brown rice is so versatile, you’ll want it with everything! Here are my favorite ways to serve it:
- With Protein: Pair with grilled chicken, salmon, or tofu for a balanced meal.
- In Bowls: Build a grain bowl with roasted veggies, avocado, and a drizzle of soy sauce.
- As a Side: Serve with curry, stew, or chili—it soaks up flavors beautifully.
- For Breakfast: Top with a fried egg and hot sauce for a quick morning dish.
How to Store Aroma Rice Cooker Brown Rice
Storing this rice is easy, so you can enjoy it later. After cooking, let it cool to room temperature. Put it in an airtight container and pop it in the fridge.
It stays good for 3-4 days. To reheat, sprinkle a little water over the rice, cover with a damp paper towel, and microwave in 30-second bursts until warm.
For freezing, portion the rice into freezer bags or containers. It lasts up to 3 months. Thaw in the fridge overnight, then reheat as above. I always freeze extra for quick meals—it saves so much time!
Aroma Rice Cooker Brown Rice Recipe FAQs
1. How much water do I need for brown rice in an Aroma rice cooker?
Use 2 ¼ cups of water for every 1 cup of brown rice. This ratio works perfectly for long-grain brown rice in my Aroma cooker. If you’re using the cooker’s measuring cup (about ¾ standard cup), fill water to the marked line for 1 cup of rice. Too little water makes the rice hard, so measure carefully.
2. Can I use the white rice setting for brown rice?
You can, but it’s not ideal. The white rice setting cooks faster, so your brown rice might be underdone. I always use the brown rice setting for best results. If your cooker doesn’t have one, add an extra ¼ cup water and check after the cycle ends. You might need to restart it.
3. Why is my brown rice sticky?
Sticky rice usually means too much starch or water. Rinse the rice well until the water runs clear to remove starch. Also, stick to the 2 ¼ cups water per 1 cup rice ratio. I once forgot to rinse, and my rice was gluey—rinsing makes a huge difference!
4. Can I add flavors to the rice while cooking?
Yes, it’s so easy! I sometimes swap water for chicken broth or add a bay leaf for extra taste. You can also toss in garlic cloves or herbs like rosemary. Just add them before starting the cooker. Experiment to find your favorite combo—it’s fun!
5. How long does brown rice take in an Aroma rice cooker?
It takes about 35-45 minutes, depending on your model. My digital Aroma cooker beeps when done, and the last 12 minutes show on the display. Letting it rest for 5 minutes after cooking makes it fluffier. It’s hands-off, so you can do other things!
6. Can I cook other grains in my Aroma rice cooker?
Absolutely! I’ve made quinoa, wild rice, and barley in mine. Each grain needs a different water ratio and time, so check your manual. For quinoa, I use 2 cups water per 1 cup grain. It’s a great way to mix up your meals.
Aroma Rice Cooker Brown Rice Recipe
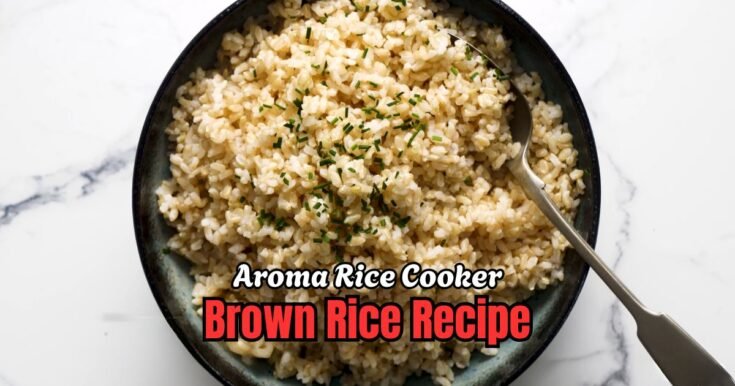
Aroma Rice Cooker Brown Rice made easy in just 45 minutes! Enjoy fluffy, healthy brown rice every time with this foolproof rice cooker method.
Ingredients
- Brown Rice (long-grain preferred): 1 cup
- Water: 2 ¼ cups
- Salt (optional): ½ teaspoon
- Olive Oil (optional): 1 teaspoon
Instructions
Step 1 | Measure the Rice
Grab your rice cooker’s measuring cup. Scoop 1 cup of brown rice. If you’re using a standard cup, it’s about ¾ of that. I like to make enough for leftovers.
Step 2 | Rinse the Rice
Put the rice in a fine mesh strainer. Run cold water over it for 10-15 seconds, stirring with your hand. Keep rinsing until the water is mostly clear. This removes extra starch so the rice doesn’t get gummy. Shake off extra water.
Step 3 | Add to Cooker
Pour the rinsed rice into the rice cooker’s inner pot. Spread it out evenly with your spoon.
Step 4 | Measure Water
Use a liquid measuring cup to add 2 ¼ cups of cold water to the pot. The extra water helps cook the brown rice’s tough bran layer. If your cooker has water lines, fill to the “1 cup” brown rice mark instead.
Step 5 | Add Salt and Oil (Optional)
Sprinkle in ½ teaspoon of salt for flavor. I also add 1 teaspoon of olive oil to keep the grains separate. Stir gently to mix.
Step 6 | Set Up the Cooker
Place the inner pot into the rice cooker. Make sure it’s snug. Close the lid tight.
Step 7 | Turn It On
Plug in the rice cooker. Press the POWER button to turn it on. The light should glow.
Step 8 | Select Brown Rice Setting
Press the BROWN RICE button. If your model doesn’t have one, use the WHITE RICE button, but it might need a bit longer. The cooker will start automatically.
Step 9 | Let It Cook
Walk away and let the magic happen! The rice takes about 35-45 minutes, depending on your cooker. You’ll hear a beep when it’s done, and it’ll switch to KEEP-WARM mode. My digital display shows a countdown for the last 12 minutes, which I love.
Step 10 | Rest the Rice
Don’t open the lid right away. Let the rice sit for 5 minutes in KEEP-WARM mode. This makes the grains fluffier.
Step 11 | Fluff and Serve
Open the lid (watch for steam!). Use a rice paddle or wooden spoon to fluff the rice. Scoop it into bowls and enjoy!
Nutrition Information:
Serving Size: 1Amount Per Serving: Calories: 215Total Fat: 2gSaturated Fat: 0.3gSodium: 293mgCarbohydrates: 45gFiber: 3.5gProtein: 5g
Did you make this Aroma Rice Cooker Brown Rice Recipe? Please leave a ⭐ rating and review!