
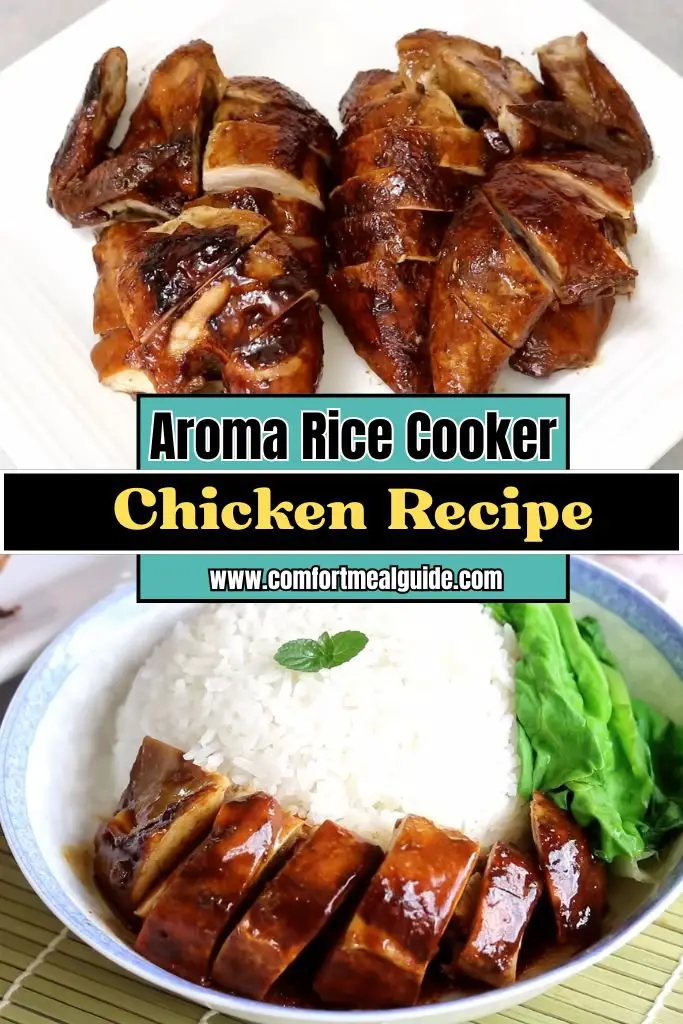
Aroma Rice Cooker Chicken Recipe
A simple way to cook juicy chicken at home is with this Aroma Rice Cooker Chicken Recipe. No oven, no fancy tools—just add your ingredients and let the rice cooker do the work.
It’s one of my go-to meals when I want something tasty but don’t want to stand in the kitchen for hours.
This recipe makes the chicken soft, full of flavor, and easy to enjoy with rice or veggies. It’s great for beginners or anyone who wants a no-fuss dinner.
I love how my Aroma Rice Cooker makes cooking feel easy and fun. You’ll love it too—especially when the kitchen starts to smell amazing!
Want a full meal? Pair this chicken with my Aroma Rice Cooker Brown Rice Recipe. They go great together!
Let’s get started—you’re going to love this easy dish!
Why You Love This Aroma Rice Cooker Chicken
This recipe is a game-changer, and here’s why:
- Super Easy: Just toss ingredients in the rice cooker and let it do the magic.
- Tasty: The chicken comes out juicy with flavors that pop.
- Healthy: Uses simple, fresh ingredients for a wholesome meal.
- Saves Time: Perfect for busy days when you want a home-cooked dinner fast.
I’m obsessed with how little effort this takes! The Aroma Rice Cooker makes the chicken tender and flavorful every time.
Aroma Rice Cooker Chicken Ingredients
Here’s everything you need to make this delicious dish. I’ve included details to help you pick the best ingredients:
- Chicken Breasts (2 pounds): I use boneless, skinless chicken breasts because they cook evenly and stay juicy. Fresh is best, but frozen works if thawed first. Trim any fat for a cleaner taste.
- Olive Oil (2 tablespoons): This adds a bit of richness and helps the spices stick to the chicken. Extra virgin olive oil gives a nice flavor, but any kind will do.
- Garlic (3 cloves, minced): Fresh garlic gives a bold, savory kick. You can use pre-minced garlic from a jar if you’re in a rush, but fresh is tastier.
- Soy Sauce (1/4 cup): Low-sodium soy sauce adds a salty, umami flavor without being too heavy. It helps tenderize the chicken, too.
- Chicken Broth (1 cup): This keeps the chicken moist and adds extra flavor. I use low-sodium broth to control the saltiness. You can swap it with water in a pinch.
- Onion (1 medium, chopped): A yellow or white onion adds sweetness and depth. Chop it into small pieces so it blends well with the chicken.
- Paprika (1 teaspoon): This gives a mild smoky flavor and a pretty red color. Smoked paprika is great for a bolder taste, but regular works fine.
- Black Pepper (1/2 teaspoon): Freshly ground pepper adds a little heat. Adjust to your taste if you like it milder.
- Dried Thyme (1 teaspoon): Thyme brings an earthy, herby flavor that pairs perfectly with chicken. You can use fresh thyme if you have it—just double the amount.
- Carrots (2 medium, sliced): These add a touch of sweetness and crunch. Peel and slice them into thin rounds for even cooking.
- Green Beans (1 cup, trimmed): Fresh green beans give color and a crisp texture. You can use frozen, but fresh tastes better.
Helpful Swaps
If you’re missing something, don’t worry! Here are some easy swaps:
- Chicken Breasts: Use chicken thighs for a richer flavor. They’re juicier but take a bit longer to cook.
- Olive Oil: Swap with vegetable oil or melted butter if that’s what you have.
- Soy Sauce: Try tamari for a gluten-free option or coconut aminos for a lighter taste.
- Chicken Broth: Use vegetable broth or water with a pinch of salt.
- Garlic: Garlic powder (1/2 teaspoon) works if you’re out of fresh.
- Onion: Onion powder (1 teaspoon) or shallots can replace fresh onion.
- Carrots or Green Beans: Swap with zucchini, broccoli, or bell peppers for variety.
Kitchen Equipment Needed
You don’t need much to make this recipe. Here’s what I use:
- Aroma Rice Cooker: The star of the show! I use a 6-cup model, but any size works as long as it has a steam or slow cook function.
- Measuring Cups and Spoons: For accurate amounts of broth, oil, and spices.
- Cutting Board and Knife: To chop the onion, carrots, green beans, and mince garlic.
- Mixing Bowl: To toss the chicken with spices and oil.
- Tongs or Fork: To handle the chicken safely.
- Wooden Spoon: For stirring ingredients in the rice cooker.
How To Make Aroma Rice Cooker Chicken
I’m so excited to share how easy this recipe is! Follow these steps, and you’ll have a tasty meal in no time. I’ve written them for beginners, so don’t worry if you’re new to cooking.
Step 1 | Prep the Chicken
Pat the chicken breasts dry with paper towels. This helps them soak up the flavors. Cut them into bite-sized pieces for faster cooking.
Step 2 | Season the Chicken
In a mixing bowl, toss the chicken with olive oil, paprika, black pepper, thyme, and minced garlic. Make sure every piece is coated. Let it sit for 10 minutes if you have time—it makes the chicken tastier!
Step 3 | Chop Veggies
While the chicken marinates, chop the onion into small pieces and slice the carrots into thin rounds. Trim the ends off the green beans and cut them in half if they’re long.
Step 4 | Set Up the Rice Cooker
Plug in your Aroma Rice Cooker and place the inner pot inside. Pour in the chicken broth and soy sauce, then stir to mix.
Step 5 | Add Ingredients
Add the seasoned chicken to the rice cooker pot. Spread it out evenly. Then, layer the chopped onion, carrots, and green beans on top. Don’t stir—this helps the veggies steam perfectly.
Step 6 | Start Cooking
Close the lid securely. Press the POWER button to turn on the rice cooker. Select the SLOW COOK function and set it for 2 hours. The cooker will beep when it starts.
Step 7 | Check Progress
After 1.5 hours, open the lid carefully (watch for steam!) and check if the chicken is cooked. It should be tender and reach 165°F inside. If not, cook for another 15-30 minutes.
Step 8 | Finish Up
Once done, the rice cooker will switch to KEEP-WARM. Stir everything gently to mix the flavors. Taste and add a pinch of salt if needed.
Step 9 | Serve
Use tongs to scoop the chicken and veggies onto plates. Enjoy your meal!
Recipe Tips for Success
Here are some extra tips to make your dish perfect. These aren’t in the steps but will help you shine:
- Don’t Overcrowd: Leave space in the rice cooker so everything cooks evenly.
- Taste the Broth: Before adding chicken, taste the broth-soy sauce mix. Adjust with a splash of water if it’s too salty.
- Use Fresh Veggies: They taste better and hold their shape compared to frozen.
- Check Liquid: If the dish looks dry during cooking, add 1/4 cup more broth.
- Rest the Chicken: Let it sit for 5 minutes after cooking to lock in juices.
Aroma Rice Cooker Chicken Serving Suggestion
- With Rice: Pair it with fluffy white or brown rice made in the same rice cooker. Check my Aroma Rice Cooker Brown Rice Recipe for tips.
- With Bread: Warm dinner rolls or crusty bread soak up the tasty juices.
- With a Salad: A simple green salad with lettuce, cucumber, and a light dressing adds freshness.
- As a Bowl: Layer the chicken and veggies over quinoa or mashed potatoes for a hearty meal.
How to Store Aroma Rice Cooker Chicken
Leftovers are easy to save! Here’s how I store this dish:
Fridge: Let the chicken and veggies cool completely. Put them in an airtight container and store in the fridge for up to 3 days.
Freezer: For longer storage, place cooled leftovers in a freezer-safe bag or container. Freeze for up to 2 months. Label with the date so you don’t forget!
Reheating: Thaw frozen chicken in the fridge overnight. Reheat in the microwave or on the stovetop with a splash of broth to keep it moist.
Aroma Rice Cooker Chicken Recipe FAQs
Here are answers to common questions about this recipe. I’ve got you covered!
1. Can I use frozen chicken in the Aroma Rice Cooker?
Yes, but thaw it first for even cooking. Frozen chicken can release water, making the dish soggy. Thaw in the fridge overnight or in cold water for a few hours. Once thawed, follow the recipe as usual. This keeps the chicken juicy and safe to eat.
2. Can I add more vegetables to this recipe?
Absolutely! You can toss in zucchini, bell peppers, or broccoli. Just chop them into small pieces so they cook at the same rate as the carrots and green beans. Add them in step 5 with the other veggies. Don’t overfill the cooker, though, or it might cook unevenly.
3. What if I don’t have soy sauce?
No problem! Use tamari for a gluten-free option or coconut aminos for a lighter flavor. If you don’t have those, mix 1/4 cup water with 1 teaspoon salt and a pinch of sugar. It won’t be exact but still tastes good.
4. How do I clean my Aroma Rice Cooker after cooking?
Unplug the cooker and let it cool. Remove the inner pot and wash it with warm, soapy water. Use a soft sponge to avoid scratching. Wipe the inside of the cooker with a damp cloth. Dry everything before storing. This keeps your cooker ready for next time.
5. Can I make this recipe spicy?
Yes! Add 1/2 teaspoon of red pepper flakes or a dash of hot sauce to the chicken marinade in step 2. You can also mix in sliced jalapeños with the veggies. Taste as you go to control the heat. It’s a fun way to switch things up!
6. What if my chicken is dry?
Dry chicken usually means it cooked too long. Check it after 1.5 hours to avoid overcooking. Use a meat thermometer to ensure it’s 165°F. Adding extra broth (1/4 cup) during cooking helps keep it moist. Next time, try chicken thighs—they’re harder to overcook.
Aroma Rice Cooker Chicken Recipe

Easy Aroma Rice Cooker Chicken recipe ready in just 2 hours 15 mins! Juicy chicken, veggies & bold flavor all in one pot—perfect for weeknight dinners.
Ingredients
- 2 pounds boneless, skinless chicken breasts, cut into bite-sized pieces
- 2 tablespoons olive oil
- 3 cloves garlic, minced
- 1/4 cup low-sodium soy sauce
- 1 cup low-sodium chicken broth
- 1 medium onion, chopped
- 1 teaspoon paprika
- 1/2 teaspoon black pepper
- 1 teaspoon dried thyme (or 2 tsp fresh thyme)
- 2 medium carrots, peeled and sliced
- 1 cup green beans, trimmed (fresh preferred)
Instructions
Step 1 | Prep the Chicken
Pat the chicken breasts dry with paper towels. This helps them soak up the flavors. Cut them into bite-sized pieces for faster cooking.
Step 2 | Season the Chicken
In a mixing bowl, toss the chicken with olive oil, paprika, black pepper, thyme, and minced garlic. Make sure every piece is coated. Let it sit for 10 minutes if you have time—it makes the chicken tastier!
Step 3 | Chop Veggies
While the chicken marinates, chop the onion into small pieces and slice the carrots into thin rounds. Trim the ends off the green beans and cut them in half if they’re long.
Step 4 | Set Up the Rice Cooker
Plug in your Aroma Rice Cooker and place the inner pot inside. Pour in the chicken broth and soy sauce, then stir to mix.
Step 5 | Add Ingredients
Add the seasoned chicken to the rice cooker pot. Spread it out evenly. Then, layer the chopped onion, carrots, and green beans on top. Don’t stir—this helps the veggies steam perfectly.
Step 6 | Start Cooking
Close the lid securely. Press the POWER button to turn on the rice cooker. Select the SLOW COOK function and set it for 2 hours. The cooker will beep when it starts.
Step 7 | Check Progress
After 1.5 hours, open the lid carefully (watch for steam!) and check if the chicken is cooked. It should be tender and reach 165°F inside. If not, cook for another 15-30 minutes.
Step 8 | Finish Up
Once done, the rice cooker will switch to KEEP-WARM. Stir everything gently to mix the flavors. Taste and add a pinch of salt if needed.
Step 9 | Serve
Use tongs to scoop the chicken and veggies onto plates. Enjoy your meal!
Nutrition Information:
Serving Size: 1Amount Per Serving: Calories: 340Total Fat: 15gSaturated Fat: 2.5gCholesterol: 110mgSodium: 890mgCarbohydrates: 12gFiber: 3gSugar: 5gProtein: 41g
Did you make this Aroma Rice Cooker Chicken Recipe? Please leave a ⭐ rating and review!