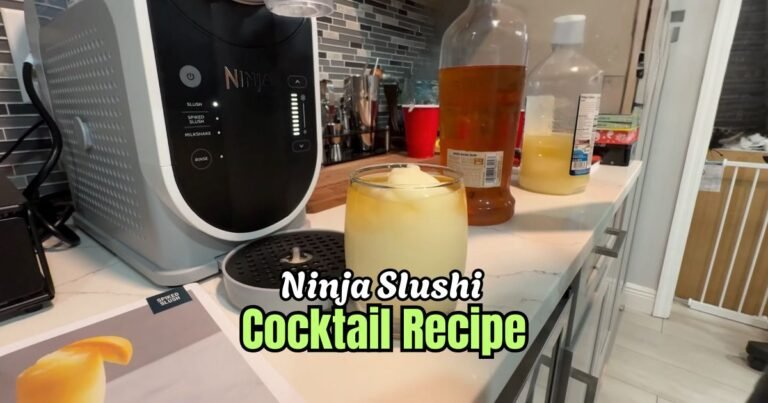

Ninja Slushi Chocolate Milkshake Recipe
I love making cold drinks at home, and my Ninja Slushi has been a game-changer! Today I want to share my Ninja Slushi Chocolate Milkshake Recipe that will blow your mind.
This isn’t just any chocolate milkshake – it’s smooth, perfectly frozen, and tastes like it came from an ice cream shop! What makes this recipe special is how the Ninja Slushi turns regular chocolate milk into a creamy frozen treat without adding ice or ice cream.
The machine does all the hard work! I make this whenever my sweet tooth calls, and it’s become my go-to dessert drink.
If you liked my other Ninja Slushi Vanilla Milkshake Recipe, you’ll love this chocolate version even more. It’s super easy to make and will cool you down on hot days!
Why I Love This Ninja Slushi Chocolate Milkshake
This recipe is one of my favorites for so many reasons:
- Quick to Make: It takes less than an hour, and the Ninja Slushi does most of the work.
- Rich Flavor: The chocolate taste is bold and satisfying, perfect for any chocolate lover.
- Customizable: You can add extras like whipped cream or chocolate sauce to make it your own.
- Kid-Friendly: My kids go crazy for it, and it’s easy enough for them to help make.
I love this Ninja Slushi Chocolate Milkshake Recipe because it’s fast, tasty, and fun. The creamy texture and deep chocolate flavor make every sip a treat.
Ninja Slushi Chocolate Milkshake Recipe
Here’s everything you need to make this delicious milkshake. I’ve broken down each ingredient so you know exactly why it’s in there.
Ingredients
- Whole Milk (4 cups): Whole milk gives the milkshake its creamy base. It’s rich and smooth, making the texture thick and luscious. I use whole milk for the best flavor, but 2% works if you want it lighter.
- Heavy Cream (1 cup): This adds extra richness and helps the shake freeze into a velvety texture. It’s like the secret to that diner-style thickness.
- Cocoa Powder (1/3 cup, unsweetened): Cocoa powder brings the deep chocolate flavor. I use unsweetened to control the sweetness and keep it bold.
- Chocolate Syrup (1/4 cup): This boosts the chocolate taste and adds a touch of sweetness. It blends smoothly for a consistent flavor.
- Granulated Sugar (1/4 cup): Sugar helps the Slushi freeze properly and balances the cocoa’s bitterness. It’s a must for the right texture.
- Whipped Cream (optional, for topping): A dollop of whipped cream on top makes it feel like a special treat. I love the fluffy contrast.
- Chocolate Sauce (optional, for drizzle): A drizzle of chocolate sauce adds a fun, decadent touch. It’s great for presentation and extra flavor.
Helpful Swaps
If you’re missing something or want to mix it up, try these swaps:
- Swap whole milk for almond or oat milk for a dairy-free version. It’s still creamy but lighter.
- Use maple syrup or honey instead of sugar. They add a different sweetness but work just as well.
- Try caramel syrup instead of chocolate syrup for a caramel-chocolate twist.
- Skip heavy cream and use more milk if you want a less rich shake.
Kitchen Equipment Needed
You don’t need much to make this milkshake, but here’s what I use:
- Ninja Slushi Professional Frozen Drink Maker: The star of the show! It freezes and mixes the shake perfectly.
- Large Mixing Bowl: For whisking all the ingredients together.
- Whisk: To blend everything smoothly before pouring it into the Slushi.
- Measuring Cups and Spoons: To get the amounts just right.
- Liquid Measuring Cup: Makes pouring the mix into the Slushi easy.
- Glasses: For serving your frosty milkshake.
- Spoon or Straw: Depending on how thick you like it!
How to Make Ninja Slushi Chocolate Milkshake
Making this milkshake is so easy, even if you’re new to cooking. Follow these steps, and you’ll have a creamy treat in no time.
Step 1 | Set Up the Ninja Slushi
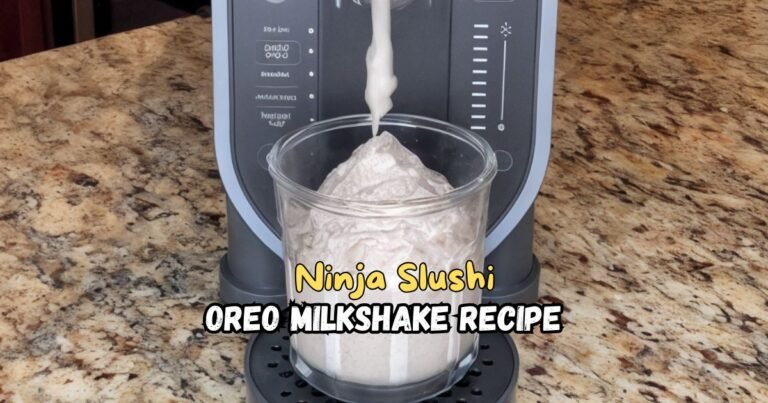
First, make sure your Ninja Slushi is clean and on a flat counter. Slide the condensation catch under the evaporator—it’s like a little tray that catches drips. Pop the auger (the spinning part) onto the evaporator and twist it until it clicks. Then, slide the vessel over the auger, push the bail handle back to lock it, and add the drip tray in front. Plug it in and you’re ready! If it’s the first time, let the machine sit upright for 2 hours before using.
Step 2 | Mix the Ingredients
Grab a large bowl and pour in 4 cups of whole milk and 1 cup of heavy cream. Add 1/3 cup cocoa powder, 1/4 cup chocolate syrup, and 1/4 cup sugar. Whisk everything together until it’s smooth and the cocoa and sugar are fully dissolved. This takes about 1-2 minutes. You want no lumps for a perfect shake.
Step 3 | Pour into the Slushi
Open the top cover of the Ninja Slushi vessel. Carefully pour your chocolate mix through the easy-fill port. Don’t go over 64 ounces (the max is about 8 cups). Close the cover tightly.
Step 4 | Select the Milkshake Preset
Press the power button to turn on the Slushi. Choose the “MILKSHAKE” preset—it’s designed for creamy drinks like this. The machine starts at the default temperature, which is great for a thick shake. If you want it icier, adjust the temperature up one notch (to 4 bars).
Step 5 | Let It Freeze
The Slushi will start spinning and freezing your mix. It takes about 30-40 minutes, depending on how much you made and the room temperature. You’ll see the LEDs pulse as it works. When it’s done, the machine beeps three times, and the LEDs stay solid. Your shake is ready!
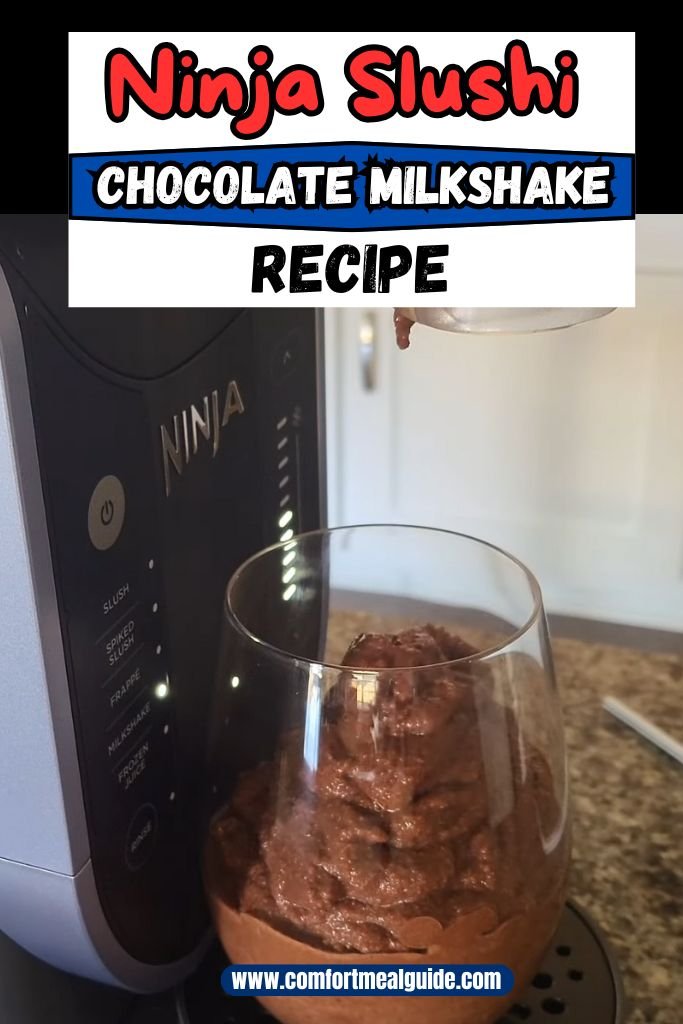
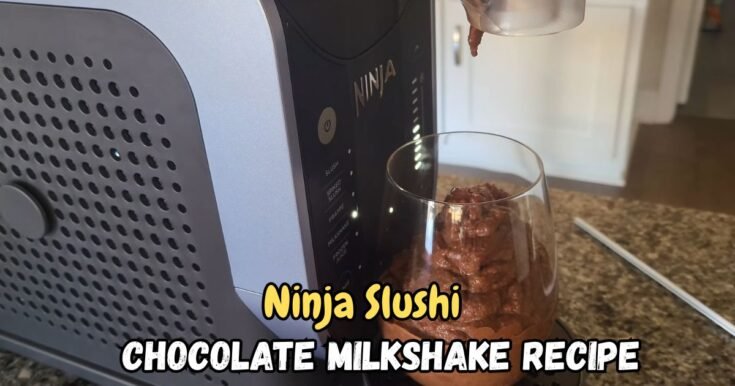
Step 6 | Dispense the Milkshake
Place a glass on the drip tray under the handle. Slowly pull the handle to pour the milkshake. Release it to stop. If it’s too thick, lower the temperature setting by one and wait a minute. If it’s too thin, raise it one notch.
Step 7 | Add Toppings
Top your milkshake with whipped cream and a drizzle of chocolate sauce if you want it extra fancy. I love adding a big swirl of whipped cream—it feels so indulgent!
Step 8 | Serve and Enjoy
Sip your milkshake with a straw or scoop it with a spoon. It’s thick, frosty, and super chocolatey. Share it with friends or keep it all to yourself—I won’t judge!
Recipe Tips for Success
Here are some quick tips to make your milkshake perfect:
- Use cold ingredients to speed up freezing.
- Whisk well so the sugar and cocoa powder fully dissolve.
- Don’t add ice or solid ingredients like ice cream to the Slushi—it’s not made for that.
- Dispense the milkshake within 30 minutes to avoid foam.
- Clean the Slushi right after use by running hot water through it and pressing the rinse button.
Make Ahead Tips
You can prep this milkshake ahead to save time. Mix all the ingredients in a bowl and store the liquid in a sealed container in the fridge for up to 24 hours.
When you’re ready, give it a quick whisk and pour it into the Ninja Slushi. This is great for parties or busy days when you want a treat without the work.
Just don’t freeze the mix ahead of time, as the Slushi needs liquid to work its magic. Prepping ahead makes it super easy to enjoy a frosty milkshake whenever you want!
What Can Serve With Ninja Slushi Chocolate Milkshake
This milkshake is a star on its own, but pairing it with snacks makes it even better. Here are some ideas:
- Cookies: Chocolate chip or oatmeal cookies add a nice crunch.
- French Fries: The sweet-salty combo is a classic!
- Fruit Slices: Strawberries or bananas balance the richness.
- Brownies: Double up on chocolate for a super indulgent treat.
I love serving this Ninja Slushi Chocolate Milkshake with warm chocolate chip cookies. The contrast of the cold, creamy shake and the chewy cookie is amazing.
How to Store Ninja Slushi Chocolate Milkshake
If you have leftover milkshake, don’t let it go to waste. Pour it into an airtight container and store it in the fridge for up to 24 hours.
It’ll melt, but that’s okay! When you’re ready to enjoy it again, whisk the mix and pour it back into the Ninja Slushi. Run the MILKSHAKE preset again, and it’ll be frosty and creamy like new.
Don’t freeze the milkshake, as it can get icy and lose its smooth texture. Storing it right keeps the flavor just as delicious for round two!
Ninja Slushi Chocolate Milkshake Recipe FAQs
1. Why did my milkshake turn foamy?
Foam happens if the milkshake sits in the Slushi too long. Dispense it within 30 minutes after the machine beeps. If it’s foamy, let it sit for a minute, then pour slowly to reduce bubbles.
2. Can I add ice cream to the Ninja Slushi?
No, the Ninja Slushi isn’t made for solid ingredients like ice cream. It works best with liquids. If you want a thicker shake, increase the freeze level or add more heavy cream to the mix.
3. How do I clean the Ninja Slushi after making the milkshake?
Cleaning is easy! Pour hot water into the vessel, close the lid, and press the rinse button. Dispense the water like you would a drink. Wipe down the outside with a damp cloth, and you’re done.
4. Can I make a smaller batch of this milkshake?
The Ninja Slushi needs at least 16 ounces of liquid to work properly. If you want a smaller serving, make the full recipe and store leftovers in the fridge for later. You can re-freeze them in the Slushi.
5. What if my milkshake is too thin?
If it’s too thin, press the up button to increase the freeze level by one or two notches. Let the Slushi run a bit longer. Next time, try chilling the ingredients first or adding less milk.
6. How long does it take to make the milkshake?
It takes 15–60 minutes, depending on the starting temperature of your ingredients. Cold liquids freeze faster. The Slushi beeps when it’s ready, so you’ll know exactly when to pour.
Ninja Slushi Chocolate Milkshake Recipe
Make the ultimate Ninja Slushi Chocolate Milkshake in just 40 minutes! Thick, creamy, and rich in chocolate—perfect for dessert or a sweet treat.
Ingredients
- Whole Milk – 4 cups
- Heavy Cream – 1 cup
- Unsweetened Cocoa Powder – 1/3 cup
- Chocolate Syrup – 1/4 cup
- Granulated Sugar – 1/4 cup
- Whipped Cream – optional, for topping
- Chocolate Sauce – optional, for drizzle
Instructions
Step 1 | Set Up the Ninja Slushi
First, make sure your Ninja Slushi is clean and on a flat counter. Slide the condensation catch under the evaporator—it’s like a little tray that catches drips. Pop the auger (the spinning part) onto the evaporator and twist it until it clicks. Then, slide the vessel over the auger, push the bail handle back to lock it, and add the drip tray in front. Plug it in and you’re ready! If it’s the first time, let the machine sit upright for 2 hours before using.
Step 2 | Mix the Ingredients
Grab a large bowl and pour in 4 cups of whole milk and 1 cup of heavy cream. Add 1/3 cup cocoa powder, 1/4 cup chocolate syrup, and 1/4 cup sugar. Whisk everything together until it’s smooth and the cocoa and sugar are fully dissolved. This takes about 1-2 minutes. You want no lumps for a perfect shake.
Step 3 | Pour into the Slushi
Open the top cover of the Ninja Slushi vessel. Carefully pour your chocolate mix through the easy-fill port. Don’t go over 64 ounces (the max is about 8 cups). Close the cover tightly.
Step 4 | Select the Milkshake Preset
Press the power button to turn on the Slushi. Choose the “MILKSHAKE” preset—it’s designed for creamy drinks like this. The machine starts at the default temperature, which is great for a thick shake. If you want it icier, adjust the temperature up one notch (to 4 bars).
Step 5 | Let It Freeze
The Slushi will start spinning and freezing your mix. It takes about 30-40 minutes, depending on how much you made and the room temperature. You’ll see the LEDs pulse as it works. When it’s done, the machine beeps three times, and the LEDs stay solid. Your shake is ready!
Step 6 | Dispense the Milkshake
Place a glass on the drip tray under the handle. Slowly pull the handle to pour the milkshake. Release it to stop. If it’s too thick, lower the temperature setting by one and wait a minute. If it’s too thin, raise it one notch.
Step 7 | Add Toppings
Top your milkshake with whipped cream and a drizzle of chocolate sauce if you want it extra fancy. I love adding a big swirl of whipped cream—it feels so indulgent!
Step 8 | Serve and Enjoy
Sip your milkshake with a straw or scoop it with a spoon. It’s thick, frosty, and super chocolatey. Share it with friends or keep it all to yourself—I won’t judge!
Nutrition Information:
Serving Size: 1Amount Per Serving: Calories: 430Total Fat: 26gSaturated Fat: 16gCholesterol: 95mgSodium: 110mgCarbohydrates: 43gSugar: 38gProtein: 8g