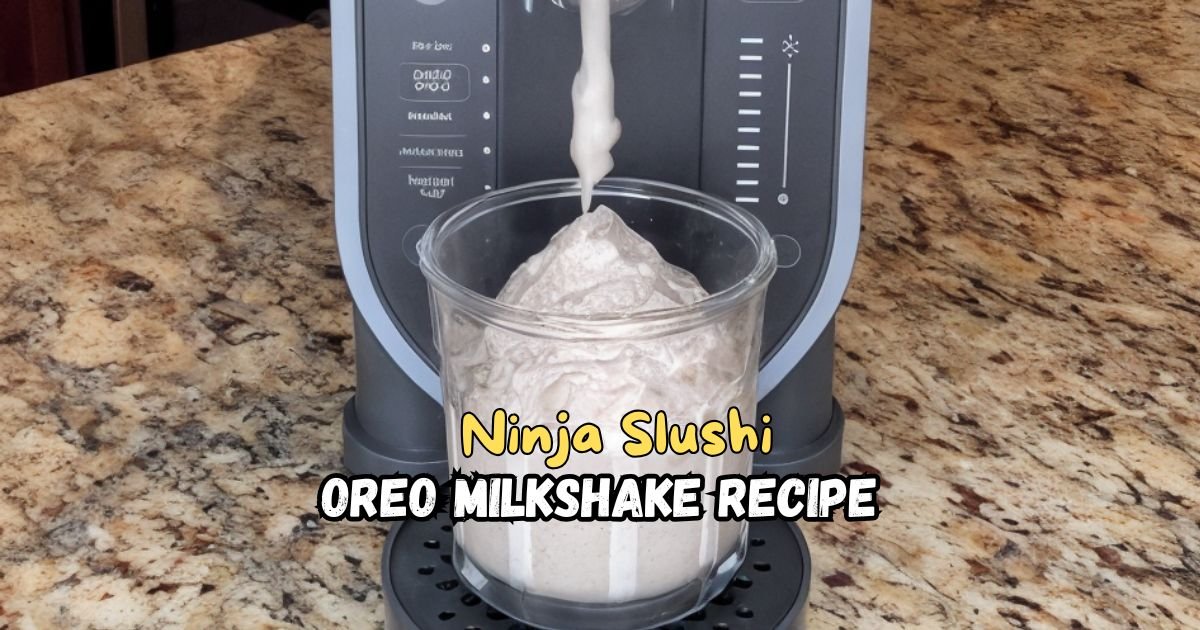
Ninja Slushi Oreo Milkshake Recipe
I love simple treats that feel fancy but are super easy to make. This Ninja Slushi Oreo Milkshake Recipe is one of my favorite cold drinks to whip up when I’m craving something sweet, creamy, and a little crunchy. And the best part?
I don’t need a blender or anything fancy—just my Ninja Slushi machine. It’s the same one I used in my Ninja Slushi Milkshake Recipe and it makes this Oreo milkshake even better.
If you like Oreo cookies (who doesn’t?), and you’ve got milk and some ice cream in your fridge, then you’re already halfway there. In just a few steps, you’ll have a smooth, cold, chocolatey drink that tastes like dessert in a cup.
So, if you’re ready to make something yummy and cool without a lot of fuss, keep reading. Trust me, you’ll love this one.

Why You Love This Ninja Slushi Oreo Milkshake
This milkshake is a total winner, and here’s why:
- Super Creamy: The Ninja Slushi makes it smooth and thick, like a fancy diner shake.
- Oreo Crunch: Those cookie bits add a fun texture you’ll crave.
- Quick to Make: Ready in under 30 minutes with just a few ingredients.
- Kid and Adult Friendly: Everyone loves the chocolatey Oreo flavor!
- Customizable: Add more cookies or swap milk for a twist.
This Ninja Slushi Oreo Milkshake is a hit because it’s creamy, crunchy, and so easy to whip up. The Ninja Slushi does all the hard work, blending everything perfectly.
Ninja Slushi Oreo Milkshake Ingredients
Here’s what you need to make this delicious milkshake. Each ingredient plays a big role in making it taste amazing.
- Vanilla Ice Cream (2 cups): This is the creamy base of your milkshake. I use full-fat vanilla ice cream because it gives a rich, smooth texture. Choose a good-quality brand for the best flavor. It melts just right in the Ninja Slushi, making your shake thick and dreamy.
- Whole Milk (1/2 cup): Milk helps thin out the ice cream so it’s drinkable but still thick. Whole milk adds creaminess, but you can use 2% if you want it a bit lighter. It balances the sweetness and makes the shake easy to sip.
- Oreo Cookies (4–6 cookies): These are the stars! Oreos bring that classic chocolatey crunch. I use regular Oreos, but you can try Double Stuff or flavored ones like mint for fun. Break them into pieces before adding for even mixing.
- Granulated Sugar (2 tablespoons): The Ninja Slushi needs at least 8 grams of sugar per 8 ounces of liquid to freeze properly. Since some ingredients might not have enough sugar, this ensures the machine works its magic.
- Whipped Cream (optional, for topping): A dollop of whipped cream on top makes it feel extra special. Use canned or homemade—both work great. It adds a light, fluffy touch.
- Crushed Oreos (optional, for garnish): Sprinkle some crushed Oreo pieces on top for extra crunch and a cool look. It’s like adding a cherry on top, but better!
Helpful Swaps
If you’re missing something or want to mix it up, here are some easy swaps:
- Ice Cream: Swap vanilla for chocolate or cookies-and-cream ice cream for a bolder flavor.
- Milk: Use almond, oat, or soy milk for a dairy-free version. Just check the sugar content for the Ninja Slushi.
- Cookies: Try other crunchy cookies like chocolate chip or graham crackers if you don’t have Oreos.
- Sugar: Use honey or maple syrup instead of granulated sugar, but keep it at 2 tablespoons to meet the machine’s needs.
Kitchen Equipment Needed
You don’t need much to make this milkshake, but here’s what I use:
- Ninja Slushi Professional Frozen Drink Maker: This is the star of the show. It blends and freezes your milkshake to the perfect texture.
- Large Measuring Cup: A 4-cup measuring cup with a spout makes it easy to mix and pour ingredients into the Slushi.
- Whisk: Use this to mix the milk, sugar, and ice cream before pouring.
- Spoon or Spatula: Handy for scooping ice cream and breaking up Oreos.
- Glasses: Tall glasses for serving. Chill them in the fridge first for an extra-cold treat.
- Straw or Spoon: A thick straw or spoon works best for sipping or scooping this creamy shake.
How To Make Ninja Slushi Oreo Milkshake
Making this milkshake is so easy, even if you’ve never used a Ninja Slushi before. Follow these steps, and you’ll have a creamy, dreamy drink in no time. I’m guiding you like I’m right there in your kitchen!
Step 1 | Get Your Ninja Slushi Ready
Make sure your Ninja Slushi is clean and set up on a flat counter. Slide the condensation catch under the evaporator—it’s like a little tray to catch drips. Check that the machine has been upright for at least 2 hours so it’s ready to go.
Step 2 | Install the Auger
Slide the auger (the spinning part) over the evaporator in the machine. Twist it gently until it clicks into place. It’s super easy, like snapping a lid on a container.
Step 3 | Set Up the Vessel
With the bail handle up, slide the vessel over the auger and evaporator. Push the handle down to lock it tight. This keeps everything sealed while the machine works.
Step 4 | Add the Drip Tray
Click the drip tray in front of the machine. It catches any spills when you pour your milkshake later.
Step 5 | Mix the Base
In a large measuring cup, scoop 2 cups of vanilla ice cream. Add 1/2 cup of whole milk and 2 tablespoons of granulated sugar. Whisk it together until the sugar dissolves and the mix is smooth. This makes sure the Ninja Slushi freezes it right.
Step 6 | Break Up Oreos
Take 4–6 Oreo cookies and break them into small pieces with your hands or a rolling pin in a ziplock bag. You want chunks, not dust, for that perfect crunch. Set aside a pinch for garnish if you want.
Step 7 | Pour Ingredients
Open the cover on top of the Ninja Slushi vessel. Pour your ice cream and milk mixture through the easy-fill port. Add the Oreo pieces on top, then close the cover.
Step 8 | Turn On the Machine
Plug in the Ninja Slushi and press the power button. Select the “MILKSHAKE” preset. It starts at the default temperature, which is perfect for a creamy shake. If you want it thicker, you can press the up button to increase the freeze level later.
Step 9 | Let It Freeze
The machine will take about 15–30 minutes to blend and freeze your milkshake. You’ll hear it churn, and the lights will pulse. When it’s done, it beeps three times, and the lights stay solid. That means it’s ready!
Step 10 | Check the Texture
Place a glass under the handle and pull it slowly to pour a little. If it’s not thick enough, press the up button to freeze it more, then wait a few minutes. It won’t be as thick as a blender shake, but it’s still super creamy.
Step 11 | Serve It Up
Pour the milkshake into chilled glasses. Top with whipped cream and a sprinkle of crushed Oreos if you’re feeling fancy. Grab a thick straw or spoon and enjoy right away!
Recipe Tips for Success
Here are some quick tips to make your milkshake even better:
- Chill Your Glasses: Pop your glasses in the fridge for 10 minutes before serving to keep the shake cold.
- Use Cold Ingredients: Start with refrigerated milk and ice cream to speed up the freezing process.
- Don’t Overfill: Stick to 16–64 ounces of liquid to avoid spills or uneven freezing.
- Taste Before Freezing: If you want it sweeter, add a bit more sugar before pouring into the Slushi.
- Clean Right Away: Rinse the machine with hot water using the rinse button to avoid sticky buildup.
Ninja Slushi Oreo Milkshake Serving Suggestion
Here’s how to serve this milkshake to make it extra fun:
- Chilled Glasses: Pour into cold glasses for a frosty vibe.
- Toppings Galore: Add whipped cream, a drizzle of chocolate syrup, or extra Oreo crumbs.
- Big Straws: Use wide straws or spoons for easy sipping or scooping.
- Side Treat: Pair with a small cookie or brownie for a dessert combo.
- Fun Setting: Serve at a movie night or summer barbecue for smiles all around.
How to Store Ninja Slushi Oreo Milkshake
If you have leftovers, here’s how to store them:
Fridge: Pour extra milkshake into a sealed container and keep it in the fridge for up to 1 day. Shake well before serving, as it may separate.
Freezing: Pour into an airtight container and freeze for up to a week. Thaw in the fridge for a few hours, then stir or blend to make it smooth again.
Serve Fresh: Milkshakes taste best fresh, so try to make just what you need.
Ninja Slushi Oreo Milkshake Recipe FAQs
1. Can I make this milkshake without a Ninja Slushi?
Yes, you can use a blender! Blend 2 cups of vanilla ice cream, 1/2 cup of milk, and 4–6 crushed Oreos until smooth. Add more milk for a thinner shake or less for a thicker one. It won’t have the same slushy texture, but it’s still delicious. Top with whipped cream and Oreo crumbs for the full experience. You might need to adjust blending time to get the right consistency.
2. Can I use dairy-free ingredients?
Absolutely! Swap vanilla ice cream for a dairy-free version, like coconut or almond-based ice cream. Use plant-based milk, such as almond or oat milk, but check it has enough sugar (at least 8 grams per 8 ounces) for the Ninja Slushi to work. Oreos are already vegan, so they’re perfect. The shake will still be creamy and tasty!
3. How do I make the milkshake thicker?
To make it thicker, press the up button on the Ninja Slushi after the first cycle to increase the freeze level. You can also use less milk (try 1/3 cup instead of 1/2 cup) or add an extra scoop of ice cream. Check the texture before serving and adjust as needed. It’ll be super thick and scoopable!
4. Why does the Ninja Slushi need sugar?
The Ninja Slushi needs at least 8 grams of sugar per 8 ounces of liquid to freeze properly, as sugar acts like antifreeze to prevent a solid block. That’s why I add 2 tablespoons of sugar to the mix. If your ingredients are low in sugar, this ensures the machine makes a smooth, slushy texture.
5. Can I add other flavors to this milkshake?
Yes, you can get creative! Try adding a tablespoon of peanut butter for a nutty twist or a dash of peppermint extract for a minty Oreo shake. You can also use flavored Oreos, like mint or golden, for a fun change. Blend in a little chocolate syrup for an extra chocolatey kick. Experiment and have fun!
6. How do I clean the Ninja Slushi after making this?
Cleaning is super easy! After dispensing all the milkshake, pour hot water into the vessel, close the lid, and press the rinse button. Let it run, then dispense the water like a drink. Remove the vessel, auger, and drip tray, and wash them by hand or in the dishwasher. Wipe the machine’s base with a damp cloth.
Ninja Slushi Oreo Milkshake Recipe
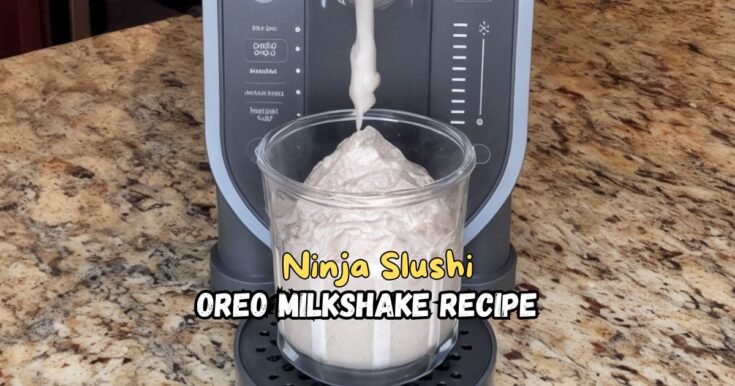
Make this creamy Ninja Slushi Oreo Milkshake in just 25 minutes! A dreamy blend of vanilla ice cream, milk & Oreos—perfect for a sweet treat.
Ingredients
- 2 cups vanilla ice cream (preferably full-fat)
- 1/2 cup whole milk (can substitute 2%)
- 4–6 Oreo cookies, broken into pieces
- 2 tablespoons granulated sugar
- Whipped cream (optional, for topping)
- Crushed Oreos (optional, for garnish)
Instructions
Step 1 | Get Your Ninja Slushi Ready
Make sure your Ninja Slushi is clean and set up on a flat counter. Slide the condensation catch under the evaporator—it’s like a little tray to catch drips. Check that the machine has been upright for at least 2 hours so it’s ready to go.
Step 2 | Install the Auger
Slide the auger (the spinning part) over the evaporator in the machine. Twist it gently until it clicks into place. It’s super easy, like snapping a lid on a container.
Step 3 | Set Up the Vessel
With the bail handle up, slide the vessel over the auger and evaporator. Push the handle down to lock it tight. This keeps everything sealed while the machine works.
Step 4 | Add the Drip Tray
Click the drip tray in front of the machine. It catches any spills when you pour your milkshake later.
Step 5 | Mix the Base
In a large measuring cup, scoop 2 cups of vanilla ice cream. Add 1/2 cup of whole milk and 2 tablespoons of granulated sugar. Whisk it together until the sugar dissolves and the mix is smooth. This makes sure the Ninja Slushi freezes it right.
Step 6 | Break Up Oreos
Take 4–6 Oreo cookies and break them into small pieces with your hands or a rolling pin in a ziplock bag. You want chunks, not dust, for that perfect crunch. Set aside a pinch for garnish if you want.
Step 7 | Pour Ingredients
Open the cover on top of the Ninja Slushi vessel. Pour your ice cream and milk mixture through the easy-fill port. Add the Oreo pieces on top, then close the cover.
Step 8 | Turn On the Machine
Plug in the Ninja Slushi and press the power button. Select the “MILKSHAKE” preset. It starts at the default temperature, which is perfect for a creamy shake. If you want it thicker, you can press the up button to increase the freeze level later.
Step 9 | Let It Freeze
The machine will take about 15–30 minutes to blend and freeze your milkshake. You’ll hear it churn, and the lights will pulse. When it’s done, it beeps three times, and the lights stay solid. That means it’s ready!
Step 10 | Check the Texture
Place a glass under the handle and pull it slowly to pour a little. If it’s not thick enough, press the up button to freeze it more, then wait a few minutes. It won’t be as thick as a blender shake, but it’s still super creamy.
Step 11 | Serve It Up
Pour the milkshake into chilled glasses. Top with whipped cream and a sprinkle of crushed Oreos if you’re feeling fancy. Grab a thick straw or spoon and enjoy right away!
Nutrition Information:
Serving Size: 1Amount Per Serving: Calories: 510Total Fat: 26gSaturated Fat: 15gCholesterol: 90mgSodium: 220mgCarbohydrates: 63gFiber: 1gSugar: 47gProtein: 8g
Did you make this Ninja Slushi Oreo Milkshake Recipe? Please leave a ⭐ rating and review!

